Heliconia drooping Bulb pack of 1 Bulb
₹80.00
Out of stock
Email when stock available
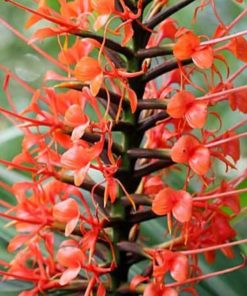
Heliconia drooping, derived from the Greek word Ἑλικώνιος (helikṓnios), is a genus of flowering plants in the monotypic family Heliconiaceae. Most of the ca 194 known specie are native to the tropical Americas, but a few are indigenous to certain islands of the western Pacific and Maluku Many species of Heliconia are found in the tropical forests of these regions. Most species are listed as either “vulnerable” or “data deficient” by the IUCN Red List of threatened species. Several species are widely cultivated as ornamentals, and a few are naturalized in Florida, Gambia and Thailand. Common names for the genus include lobster-claws, toucan beak, wild plantains or false bird-of-paradise. The last term refers to their close similarity to the bird-of-paradise flowers (Strelitzia). Collectively, these plants are also simply referred to as heliconias.
Planting & Care
Heliconia drooping like their soil rich, but exceptionally well-drained, so ideally create a mix from one part well-rotted manure, one part horticultural grit or sand, and two parts leaf mould. Two-thirds good compost mixed with one-third grit also does fine.
Sunlight: Full sun
Soil: Well-drained soil.
Water: Keep soil moist throughout the growing season.
Temprature: 28°C
Fertilizer: Apply any organic fertilizer.
Harvesting: After the Heliconia drooping has stopped flowering, it can be made to flower again. Cut the old flowers from the stem after flowering, and when the stem starts to sag, cut it back to the top of the bulb. Continue to water and fertilize as normal all summer, or for at least 5-6 months, allowing the leaves to fully develop and grow. When the leaves begin to yellow, which normally occurs in the early fall, cut the leaves back to about 2 inches from the top of the bulb and remove the bulb from the soil. Clean the bulb and place it in a cool (40-50 deg. F), dark place such as the crisper of your refrigerator for a minimum of 6 weeks. Caution: Do not store Heliconia drooping bulbs in a refrigerator that contains apples, this will sterilize the bulbs. Store the bulbs for a minimum of 6 weeks.
Care:
- Once the plant is flowering, continue the watering and keep it out of direct sunlight, and slightly cooler (10-15°C), but as light as possible to promote a longer flower life.
- Each individual flower should last two or even three weeks before they brown.
- As each one fades, cut it off at the top of the stalk and then when the whole stalk is over and begins to sag, carefully cut it off just above the bulb nose.
- After flowering you can keep them from one year to the next.
- Feeding needs to continue and you want to water too, until the leaves begin to yellow in late summer/early autumn.
- At this stage, cut the leaves back to about 6cm (2½in) from the top of the bulb and remove it from the pot.
- Keep the bulb cool (5-10°C) and dark, to give it a dormant period for 8 weeks before you can encourage it to come into leaf and flower again When the temperature in your greenhouse falls to below 10C, bring them into the warmth and begin gentle watering again and your bulb will re-shoot.
- Don t re-pot it for the first couple of years; it hates root disturbance.
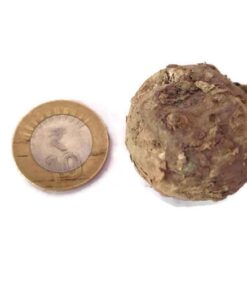
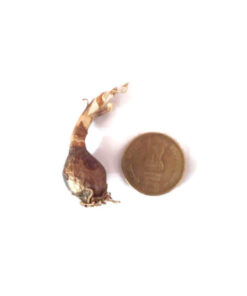
- The older and bigger the bulb, the more flowering stems you’ll get, so it’s worth the trouble of nurturing these mini football bulbs.
- Bulbs older than two years will produce offset bulblets.
- These may be left attached to the mother and re-potted with her, creating an amazing show, but its best to remove them carefully just before you replant and put them in their own individual pots.
- These little bulbs will take two years before producing their first flower, but it will be a proud moment when they do.
| Weight | 400 g |
|---|
Be the first to review “Heliconia drooping Bulb pack of 1 Bulb” Cancel reply
You must be logged in to post a review.




Reviews
There are no reviews yet.